Quiz
This feature will allow you to add a quiz into your apps. Click on  to add this feature to your app. This appears:

To create a quiz, click on “Manage model“. You get to this screen:
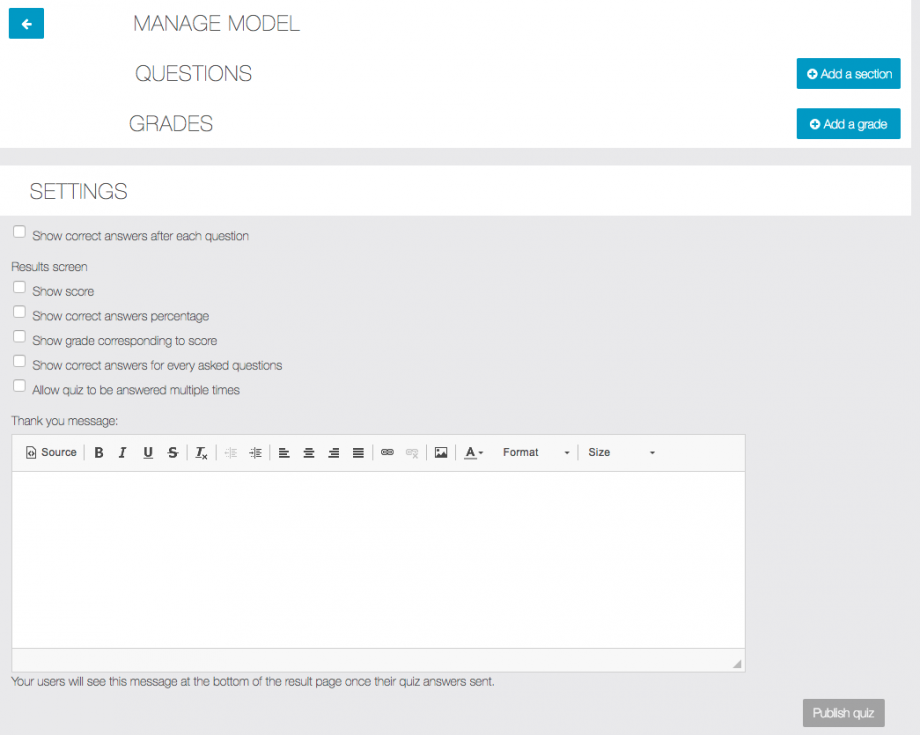
As you can see, there are 3 distinct parts:
- Questions: it’s where you will create the questions of the quiz
- Grades: this optional part allows you to create grades for the persons who will take your quiz depending on their results
- Settings
First of all, let’s see how to manage the questions. Click on “+ Add a section“. Name your section and click on “Ok“.
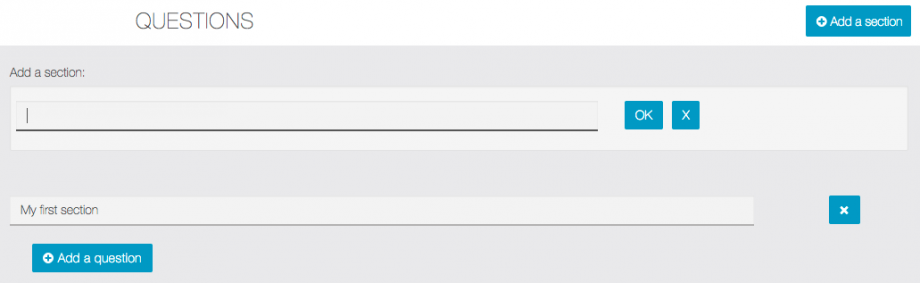
Then click on “+ Add a question“.
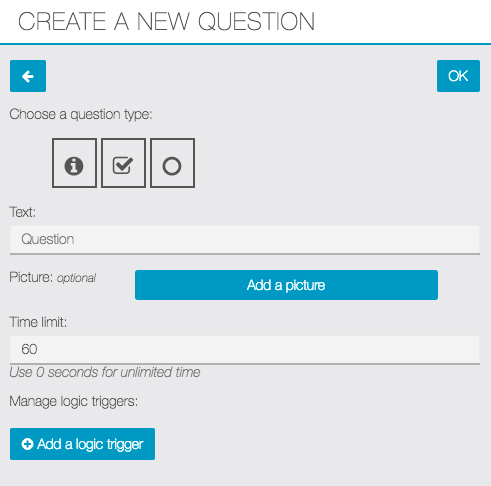
You can add three types of information:
 This is not really a question, but rather something you can add wherever you want to give instructions to those who take the quiz. Just enter your instructions and select the time limit for this text to be displayed. You can also add a picture if you want.
 This is a Checkbox type of question, meaning that you can have several good answers. Just enter your question, the potential answers, and check for correct answers. When you select an answer as the right answer, you can also decide how many points this answer is worth.
 This is a Radio type of question, meaning that only one answer can be the answer to the question. Just enter your question, the potential answers, and check the only correct answer. When you select an answer as the right answer, you can also decide how many points this answer is worth.
N.B.: If you don’t assign points to a correct answer (0 points) it will not be taken into account in the percentage of correct answers.
Now let’s have a look at the logical triggers offered with this feature. To add a logical trigger for the question you are currently editing, just click on “+ Add a logical trigger“. You will be offered the following options:
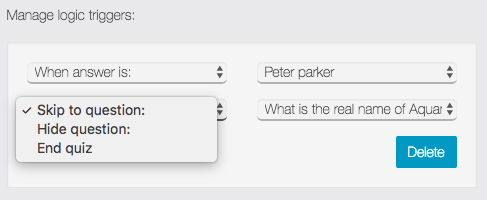
- Skip questioning: select the question you want to skip to (you can skip several questions by doing that).
- Hide question: select the question you want to hide.
- End quiz: this will… end the quiz!
You can decide if you want to use one of these actions depending on the answer which is given by the user, or if you want to always use this action. When you’re done, click on “Ok” at the top of the menu.
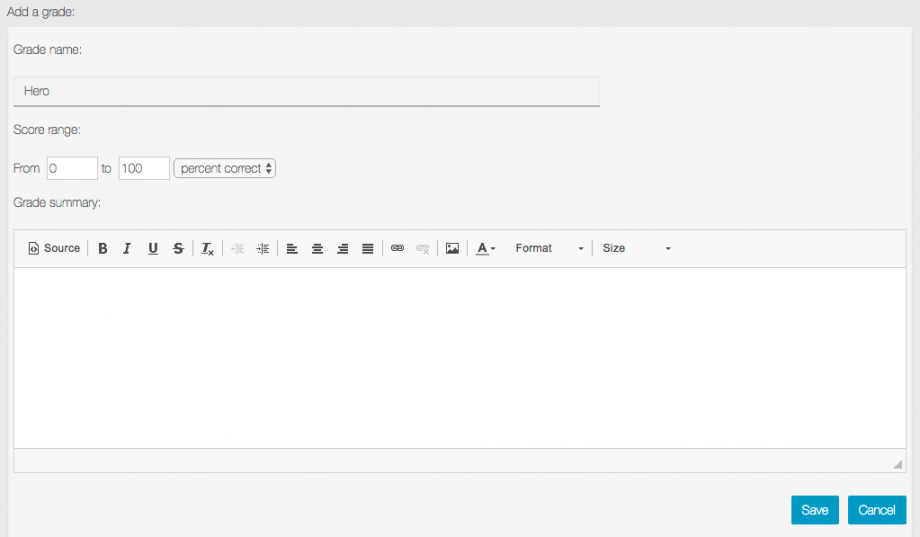
You can create as many grades as you want.
First, choose a name for your grade.
Then choose the score range for this grade. You have two options:
- A score range depending on the percentage of correct answers
- A score range depending on the number of points earned during the quiz (if you remember, you can choose the number of points given for each correct answer).
Finally, enter a description for this grade.
Once you’re done, just click on “Save“.
Then go to the “Settings” part, and select which settings you want to use. You can even write a “Thank you” message which will be displayed at the end of the quiz.
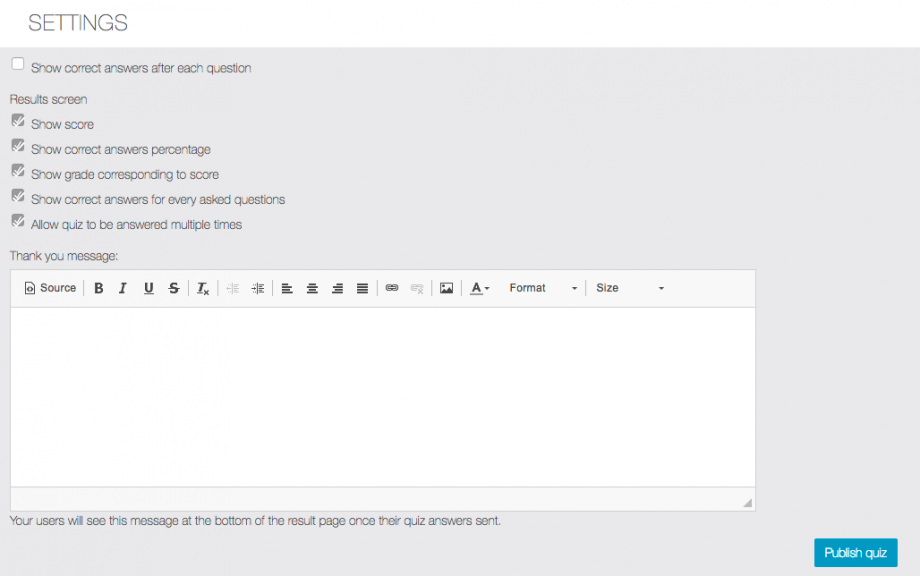
When your quiz is ready to go, just click on “Publish quiz“.
Once you are done, enter a name for your quiz and click on “Publish“.

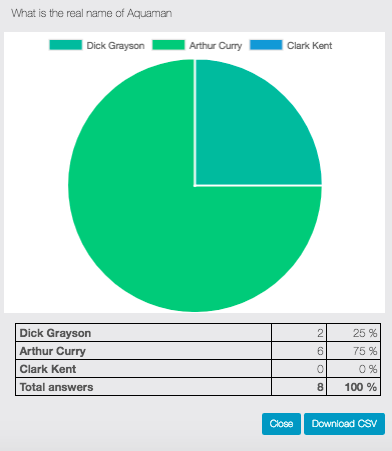
Once you have published your quiz, you can view the results by clicking on “View results” or download the results in .csv file.
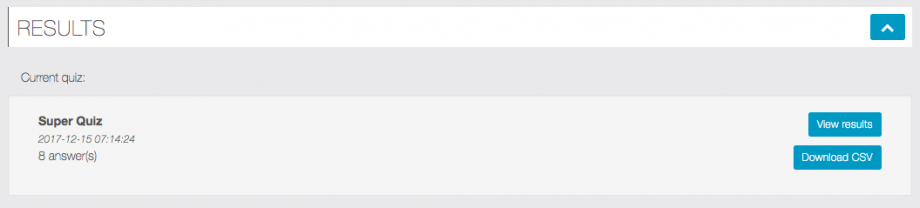
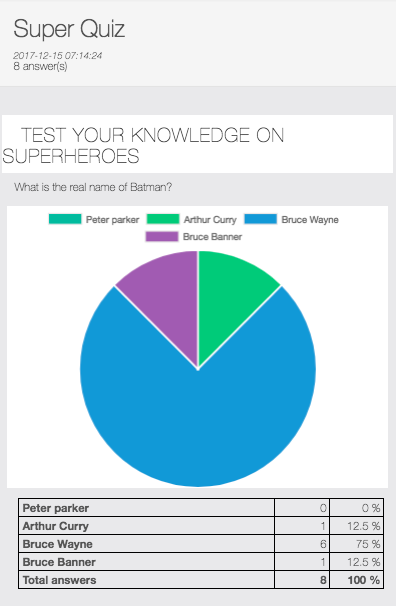
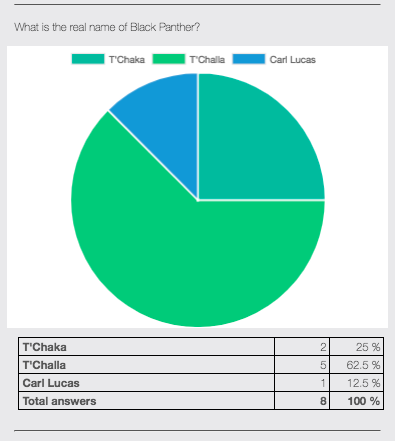
Here is an example of Results:
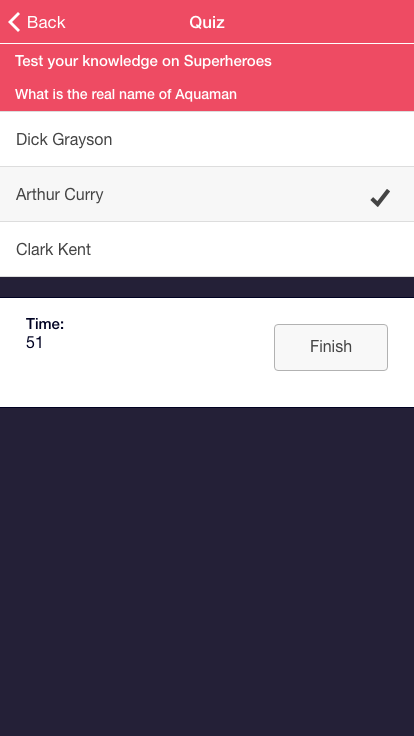
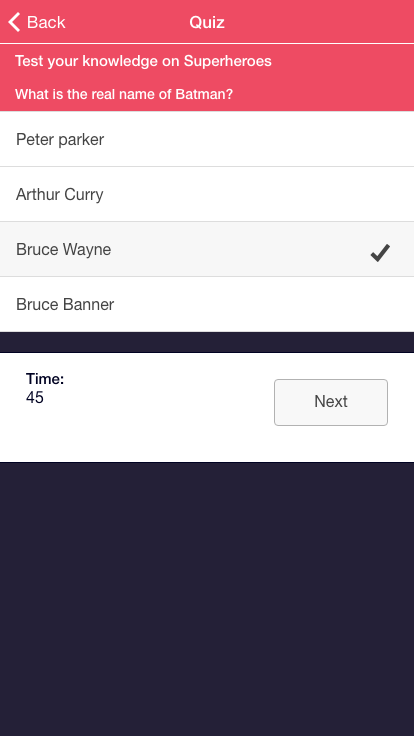
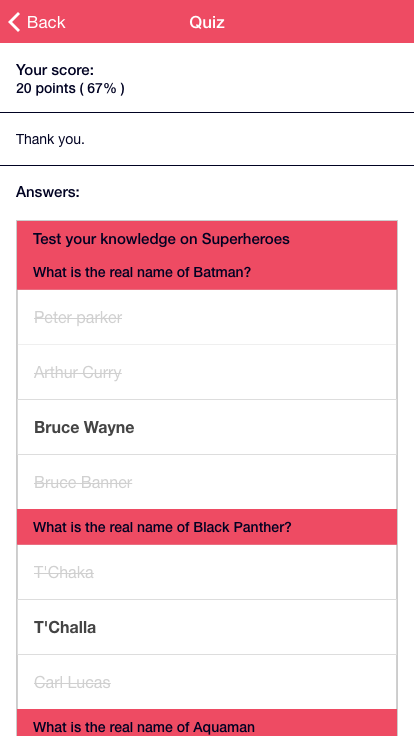
Example In The Application:
Done!